Case Study: Installation of Custom Extra Clear Green-Tinted Glass Splashbacks in Eungella, Queensland
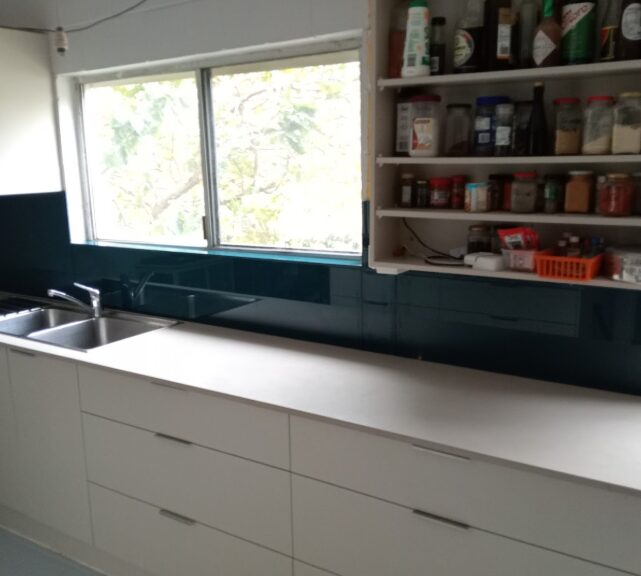
Russcos Glazing was engaged by homeowners in Eungella, Queensland, to design, supply, and install a set of custom glass splashback panels as part of their kitchen upgrade. The project involved manufacturing five individual splashback panels from 6mm extra clear glass, each tinted with a premium green shade from the Dulux colour collection. All panels were produced with flat polished edges for a refined, high-quality finish.
This case study outlines the process undertaken by Russcos Glazing, from consultation and templating through to fabrication and installation, and highlights the craftsmanship involved in creating a seamless, modern kitchen feature.
The homeowners were completing a staged renovation of their kitchen and wanted to replace their old tiled splashback with a fresh, modern alternative that would brighten the space and complement their cabinetry and benchtops. They sought a solution that was not only visually striking but also easy to clean, durable, and resistant to moisture, heat, and everyday kitchen use.
Russcos Glazing recommended installing extra clear glass splashbacks, a premium product that delivers crystal clarity and accurate colour reproduction. Unlike standard float glass, which carries a slight green tint, extra clear glass ensures the Dulux green colour selected by the homeowners appeared clean, vibrant, and true to its intended shade.
The kitchen layout required five individual splashback panels to accommodate overhead cupboards, benchtops, corners, and power points. Accurate templating was crucial to ensure each panel fit perfectly, particularly those requiring cut-outs for GPOs (general power outlets).
The panels measured:
During the site visit, Russcos Glazing:
The team’s attention to detail at this stage ensured the installation would proceed smoothly and that each panel would fit seamlessly against the kitchen walls.
Once measurements were finalised, the splashbacks were custom-manufactured from 6mm extra clear glass, selected specifically for its premium clarity and suitability for back-painting.
The use of extra clear glass allowed the Dulux tint to appear bright and consistent across all panels, producing a high-end finished look.
With the panels prepared, Russcos Glazing returned to the property to complete the installation. Because glass splashbacks require precision placement and strong, lasting adhesion, the team followed a structured process.
1. Surface Preparation
The wall surfaces were cleaned, dried, and checked for levelness. Any minor discrepancies were corrected to ensure the glass would sit flush.
2. Test Positioning
Before applying adhesive, the team dry-fitted each panel to confirm alignment and spacing, especially around GPO cut-outs and tight corners.
3. Panel Installation
Using high-strength, neutral-cure silicone adhesive, the installers fixed each splashback panel in place. Packings were used to maintain even spacing and ensure perfect level alignment.
4. Securing and Sealing
After the adhesive set, silicone was applied along select edges where required for moisture protection and aesthetics.
5. Final Polishing and Inspection
The team cleaned the panels thoroughly, checked the edges, inspected the paint backing, and ensured all GPOs were correctly aligned and accessible.
The finished installation transformed the kitchen into a bright, contemporary space. The green Dulux tint added a refreshing splash of colour while complementing the natural surrounds of Eungella. The extra clear glass maintained colour accuracy and allowed light to reflect beautifully across the benchtops, creating a crisp, modern look.
The homeowners were delighted with the result, praising the precision of the GPO cut-outs, the seamless alignment of all five panels, and the quality of the polished edges. The long, slim 200mm x 1600mm feature panel added a final touch of elegance, tying the splashback design together across the entire kitchen.
This project showcases Russcos Glazing’s expertise in delivering custom glass splashback solutions with exceptional accuracy and craftsmanship. Through careful measurement, premium materials, and meticulous installation, the team created a visually stunning and highly functional kitchen upgrade for the Eungella homeowners, one that will remain durable, attractive, and easy to maintain for years to come.
Project Details